Touchapad is a Touchable Button Pad
Smart home control is built with phones and smart hubs, which serve as our primary interface to control our smart devices. However, must we carry our smartphones or smart hubs with us to control our appliances? How can we distance ourselves from these necessary but sometimes noisy or prying devices? The Touchapad serves as an alternative solution, with a set of virtual buttons that can be placed outdoors in an electrical box or adapted to other environments.
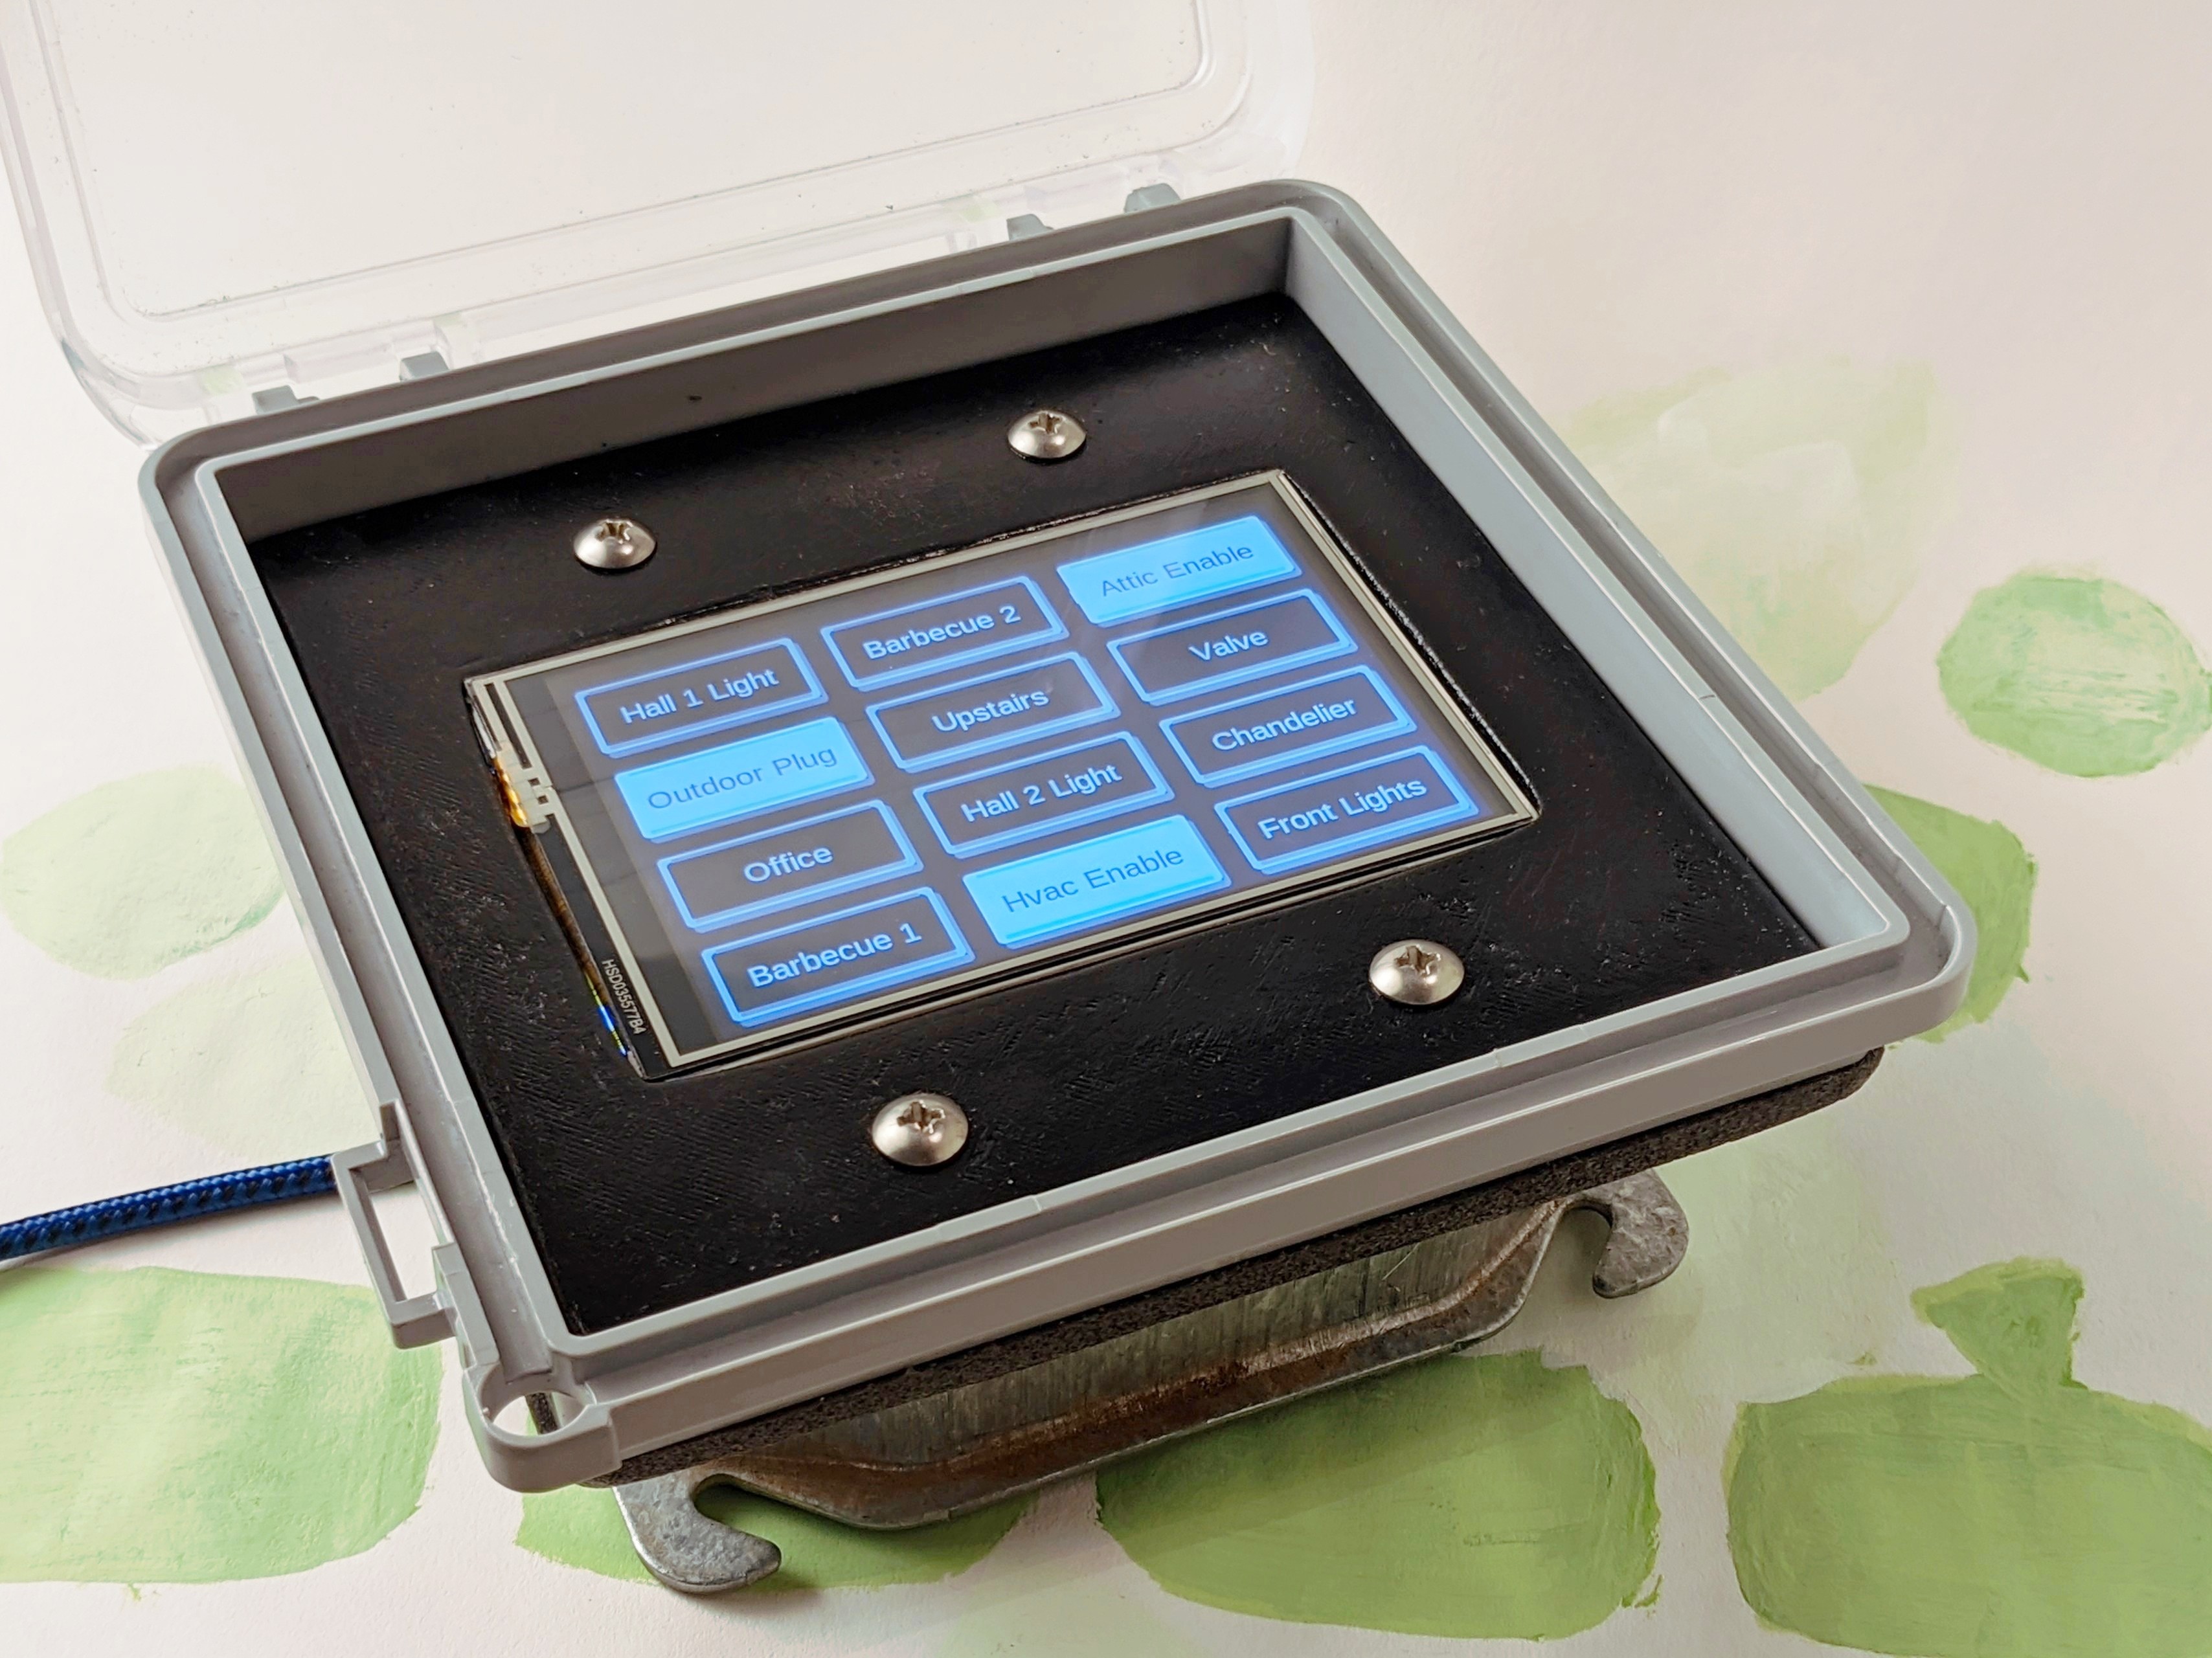
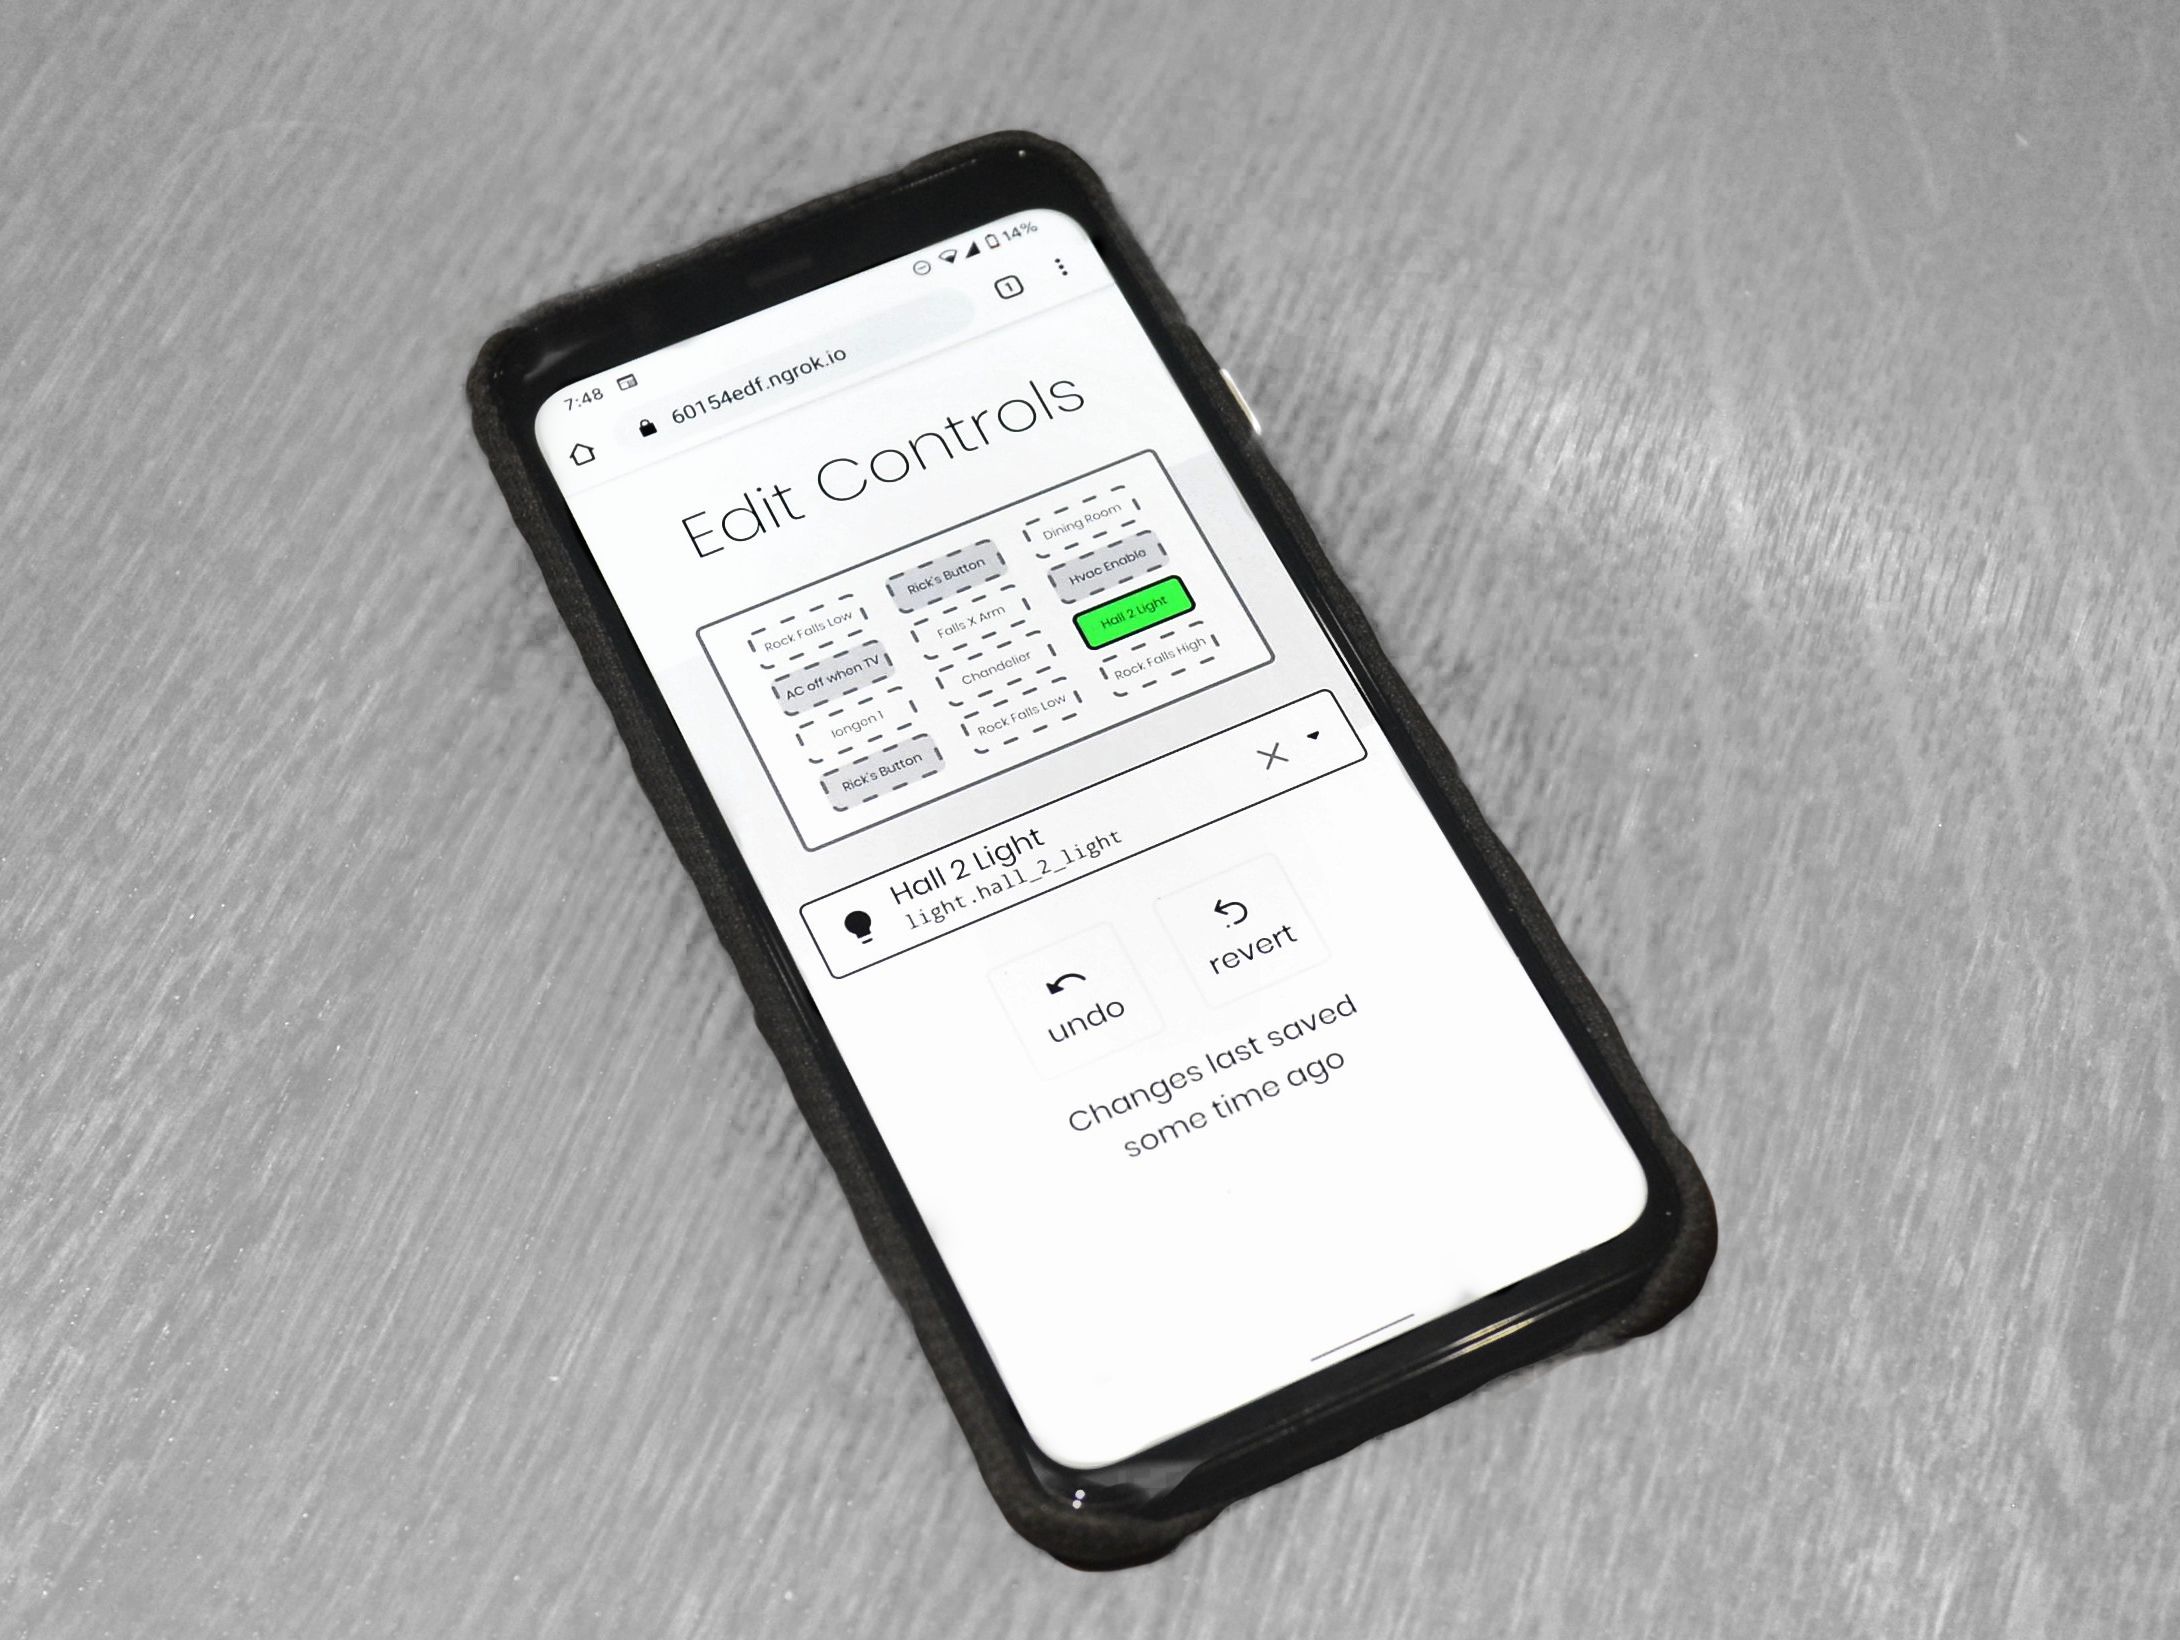
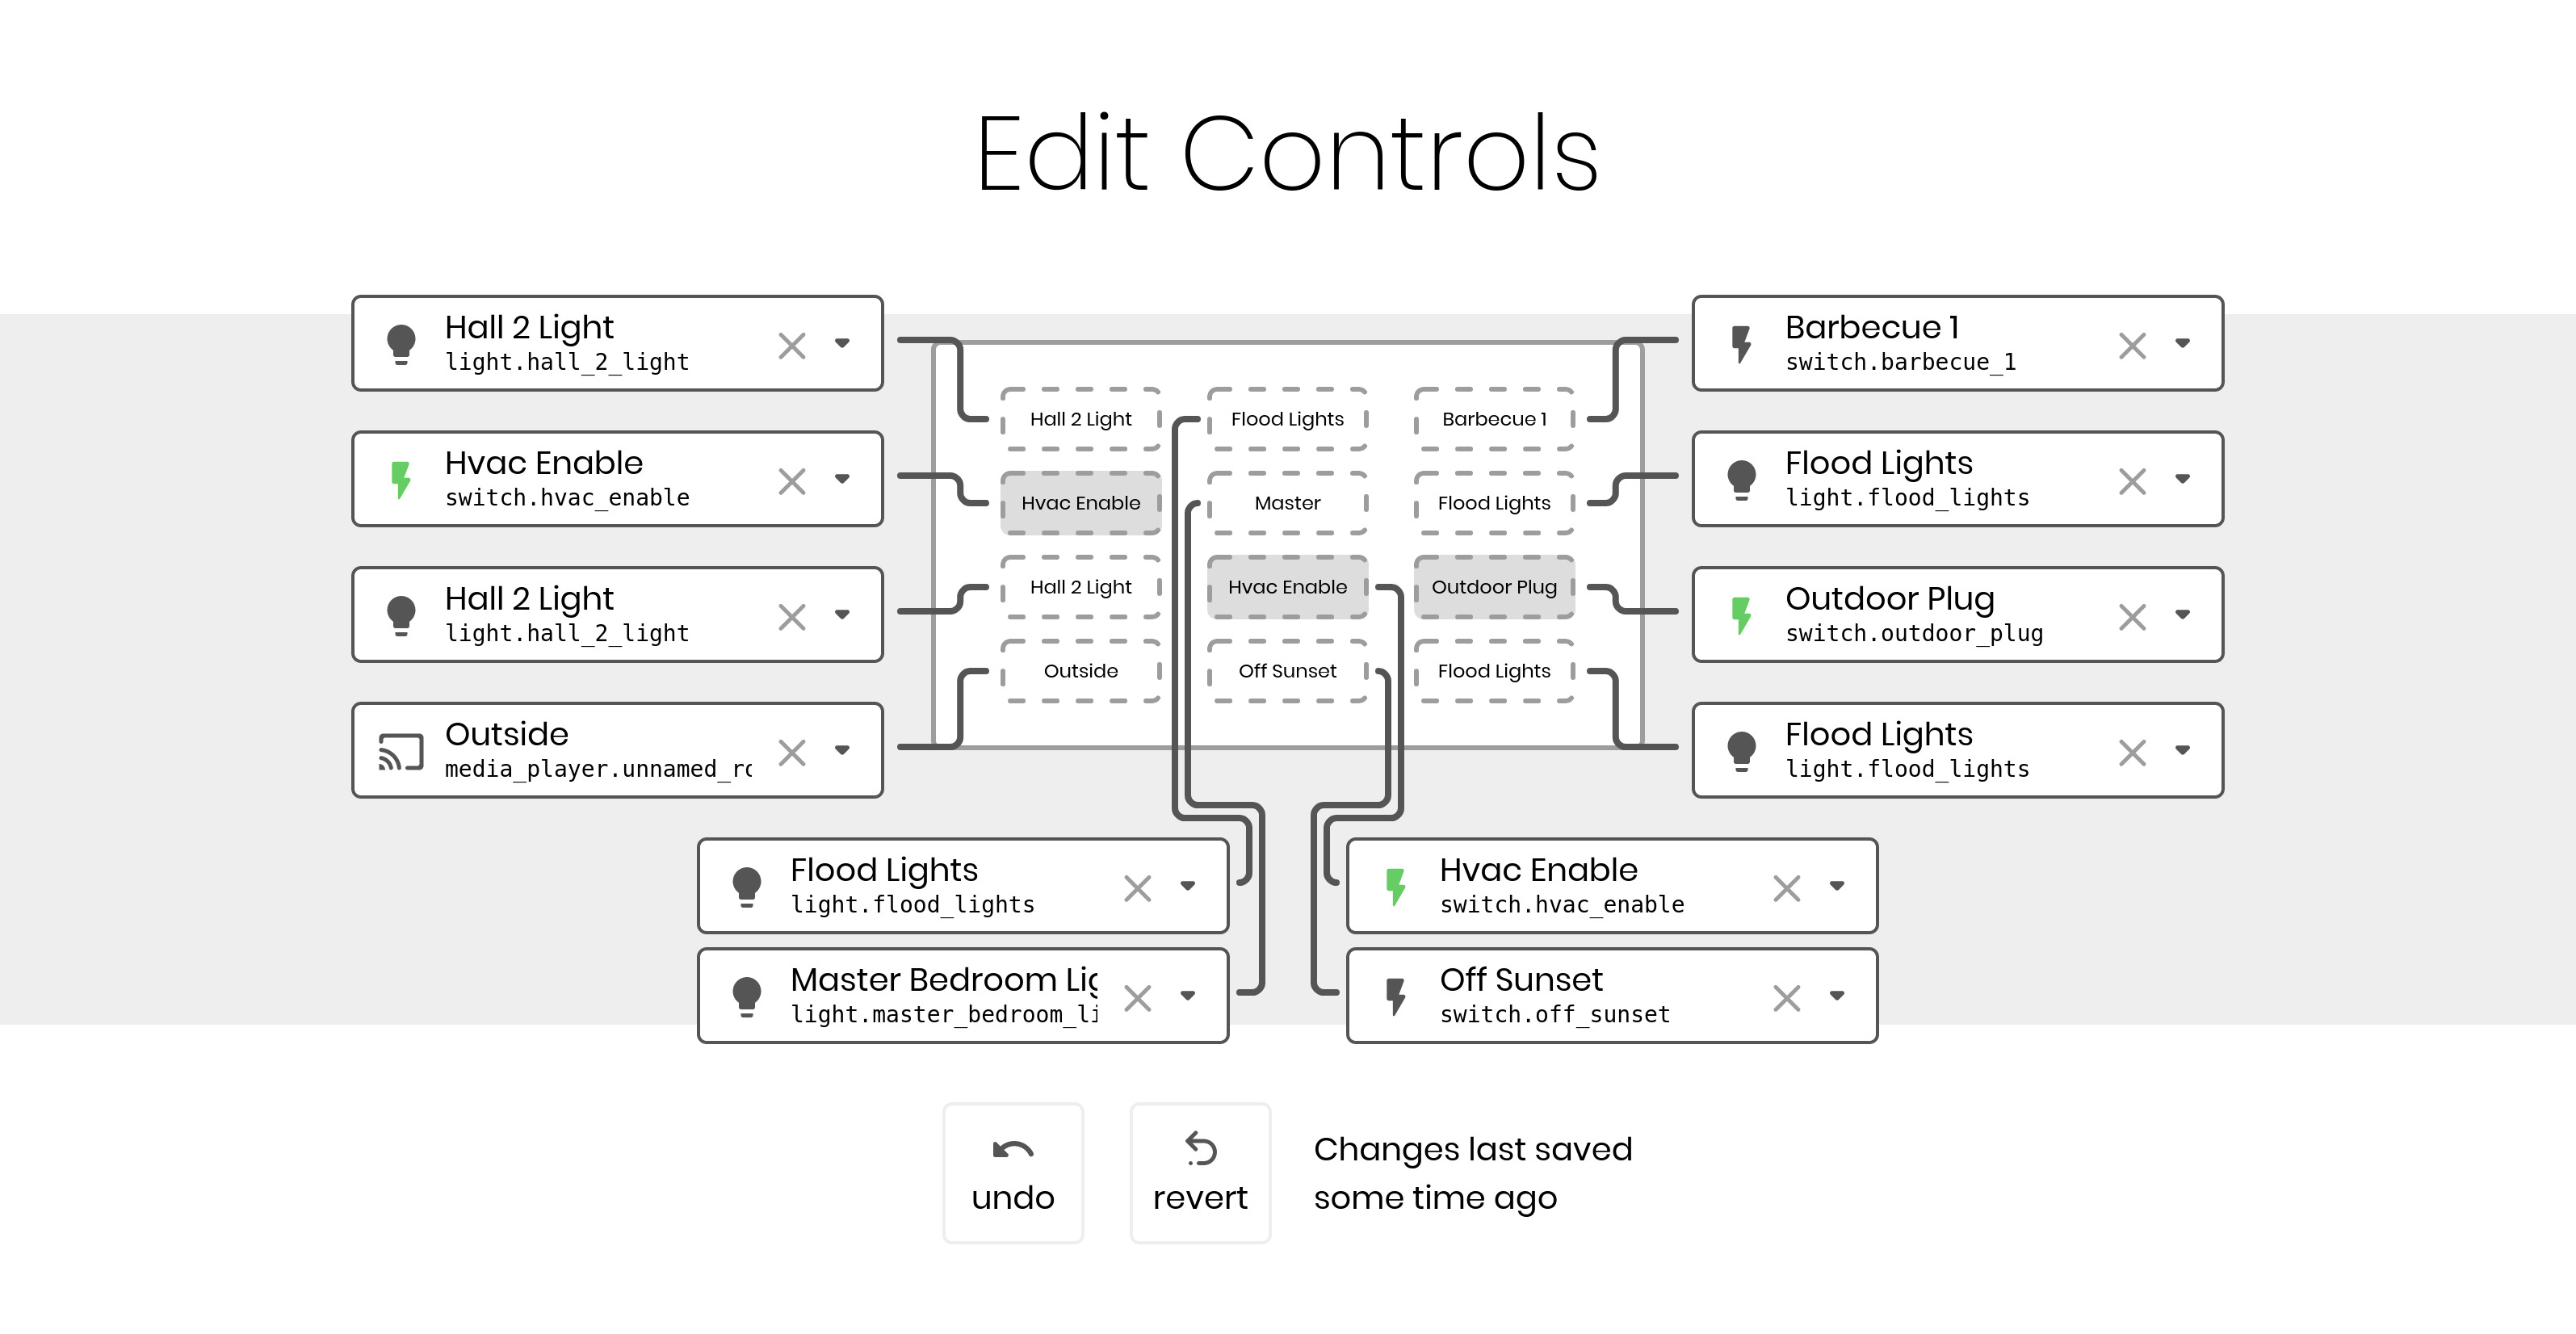
The buttons control devices linked to Home Assistant. The layout of buttons can be configured from a phone, tablet, or laptop.
Design
If the goal is be as unobtrusive as possible, why does the Touchapad use a touchscreen to display buttons? Physical buttons have three issues:
-
Communicating Consequences: The simplest of light switches are great communicators. I want to turn on a lightbulb I cannot see. I can simply flip the switch down! If the switch is already down, I know the light is already on, and I don’t need to touch the switch. But what if I connect my light to the internet and turn it off with my phone? I can no longer trust the light switch, for now the light is off but the switch is still pressed down. If I use a toggle button, I must observe whether my light is on before I press the switch, else I won’t know what pressing the switch will do. A virtual button, however, communicates its consequences. It can display whether the light is on or off through visual effects and update its status when other switches are pressed. If I turn the light off with my phone, the virtual button will update accordingly.
-
Lighting: Touchscreens have backlights. These draw extra power, but allow you to easily locate the touchscreen in the dark. Physical buttons often don’t come with built-in lighting.
-
Cost: Physical buttons that satisfy the first two constraints are possible to build. A toggle button with an adjacent led to indicate the state would suffice. However, it is difficult to find such a set of buttons like this, especially at a good price. I bought my touchscreen for about $15 and it offers vastly more flexibility over physical buttons.
The names and states of the buttons can be configured over the Arduino’s serial port. Whenever a button is pressed, the Arduino will send a message back through the serial port.
Construction
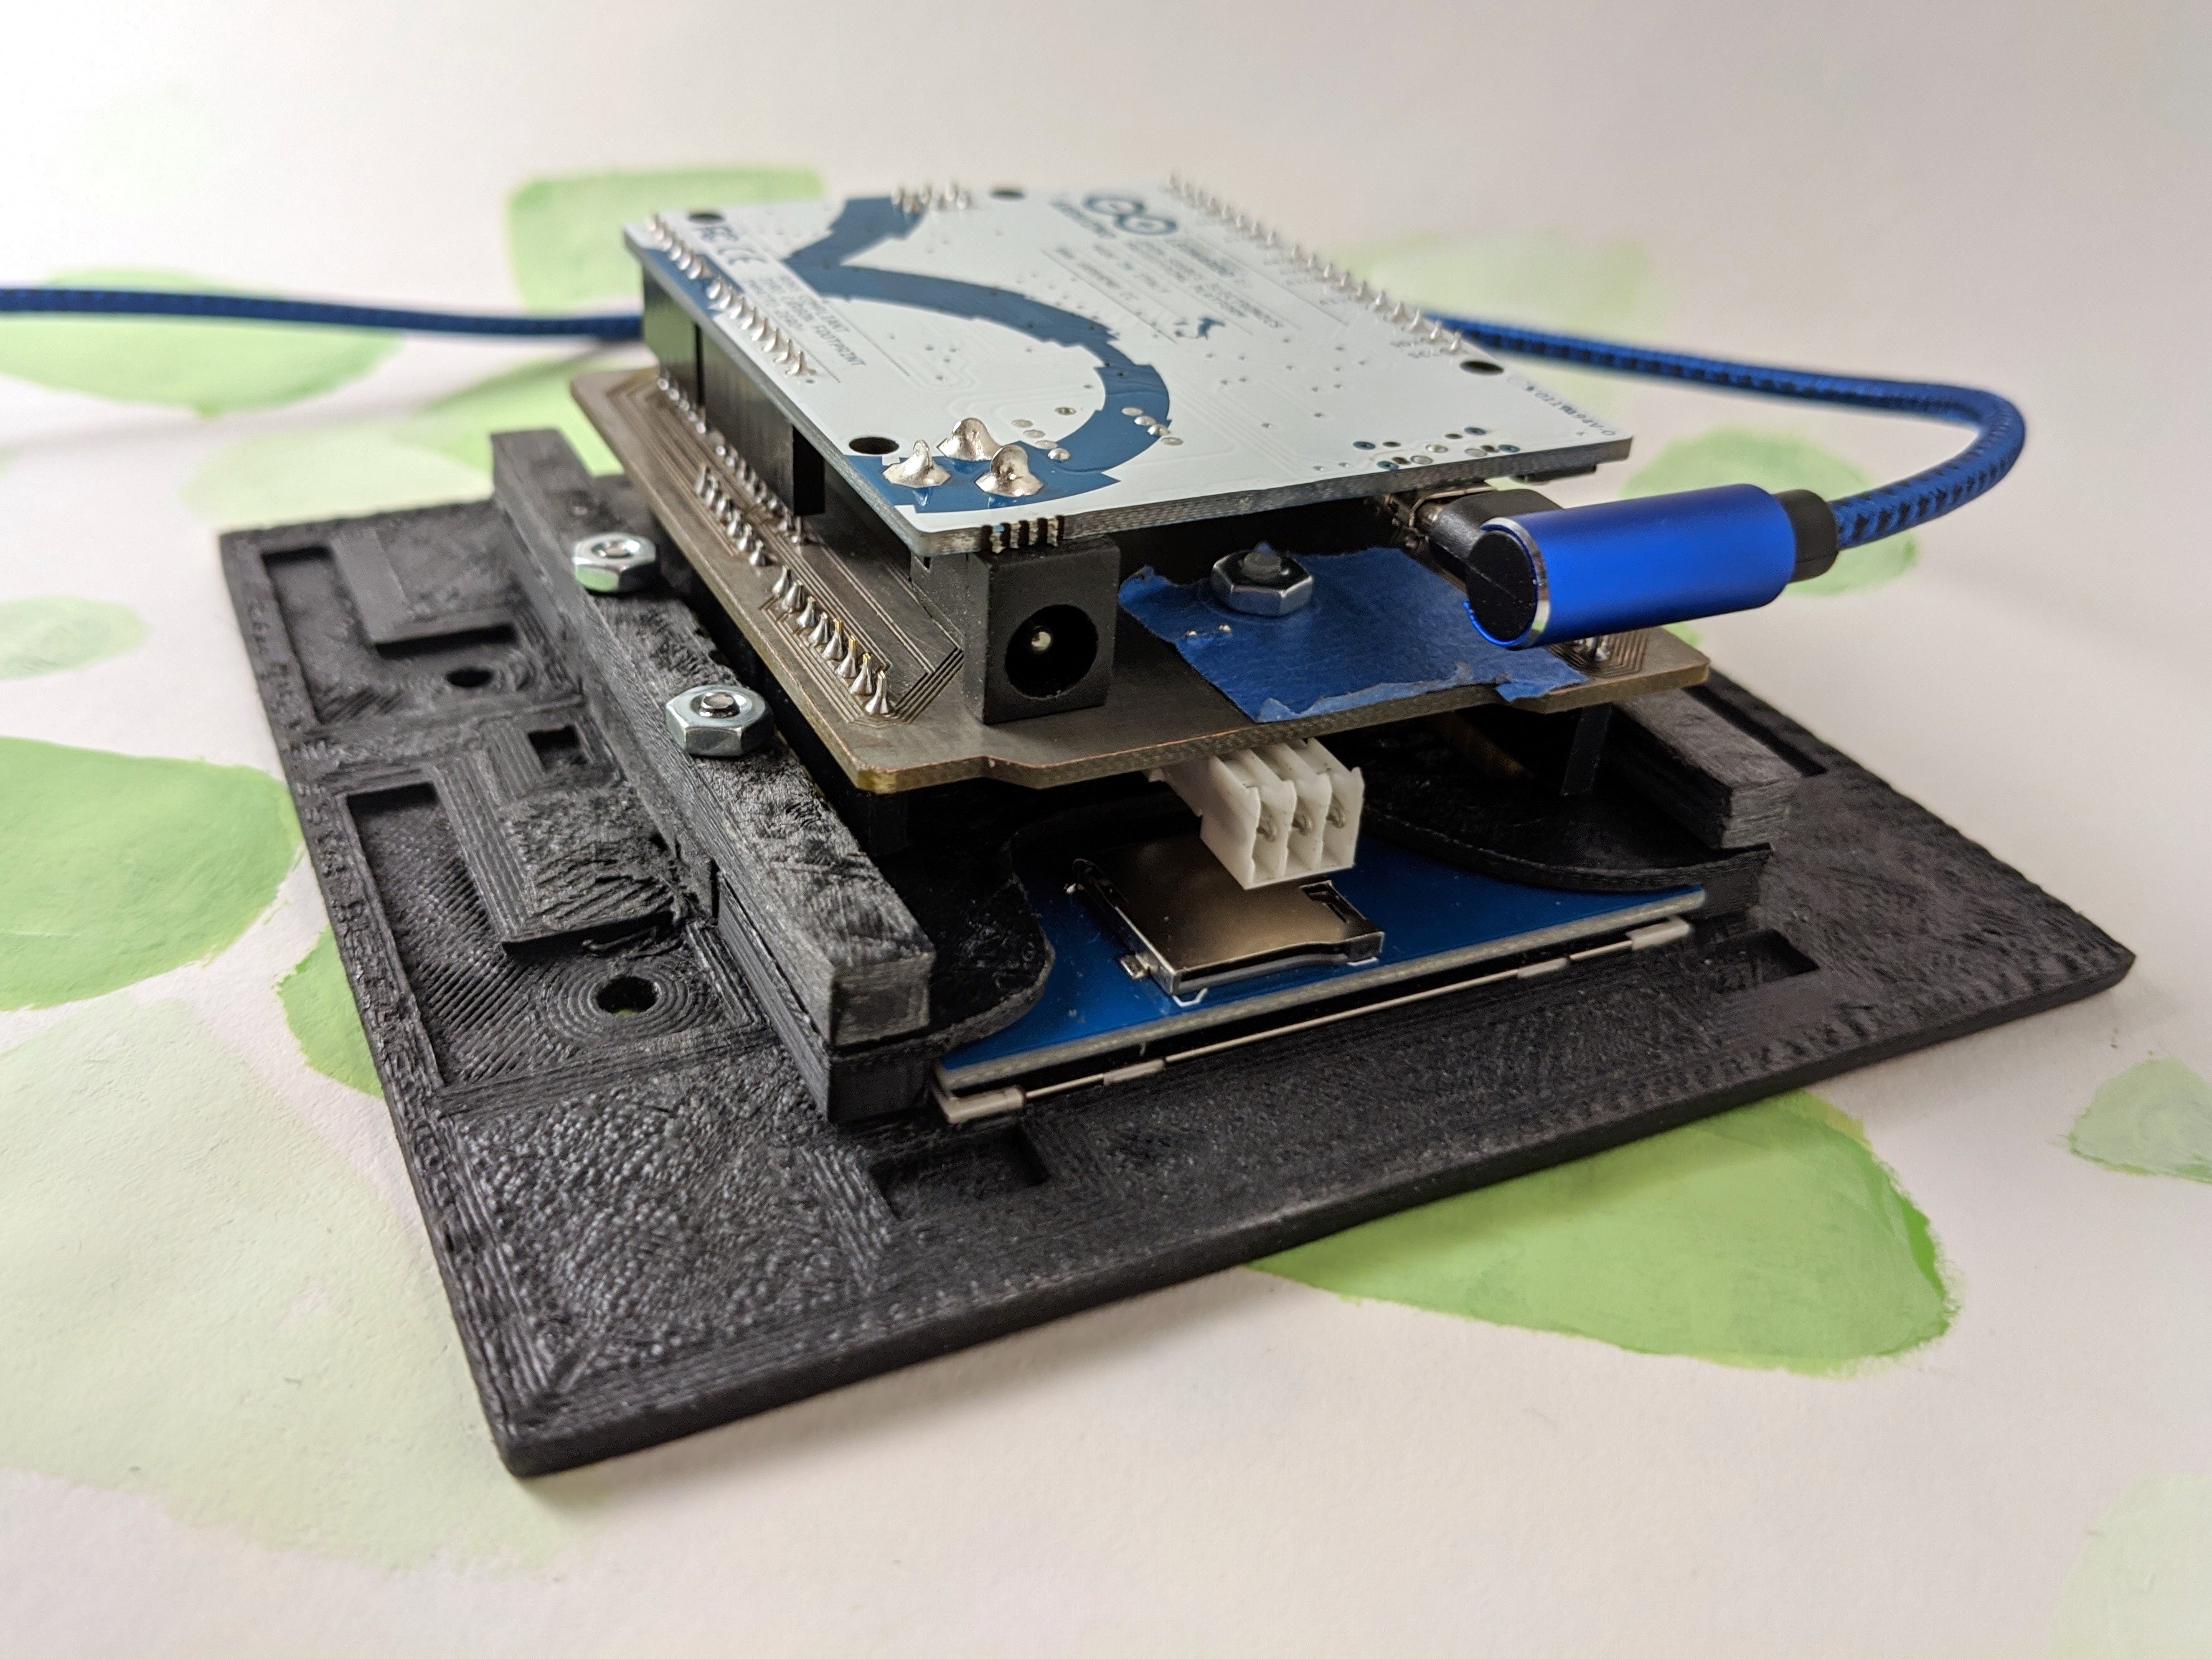
Designing the system to fit within an electrical box imposed harsh constraints. I needed to use an Arduino board to interface with the touchscreen I bought, so I decided to use an Arduino Leonardo as it is one of the few boards that comes with an Uno-style pin layout but can be interfaced with via the thinner micro USB cable.
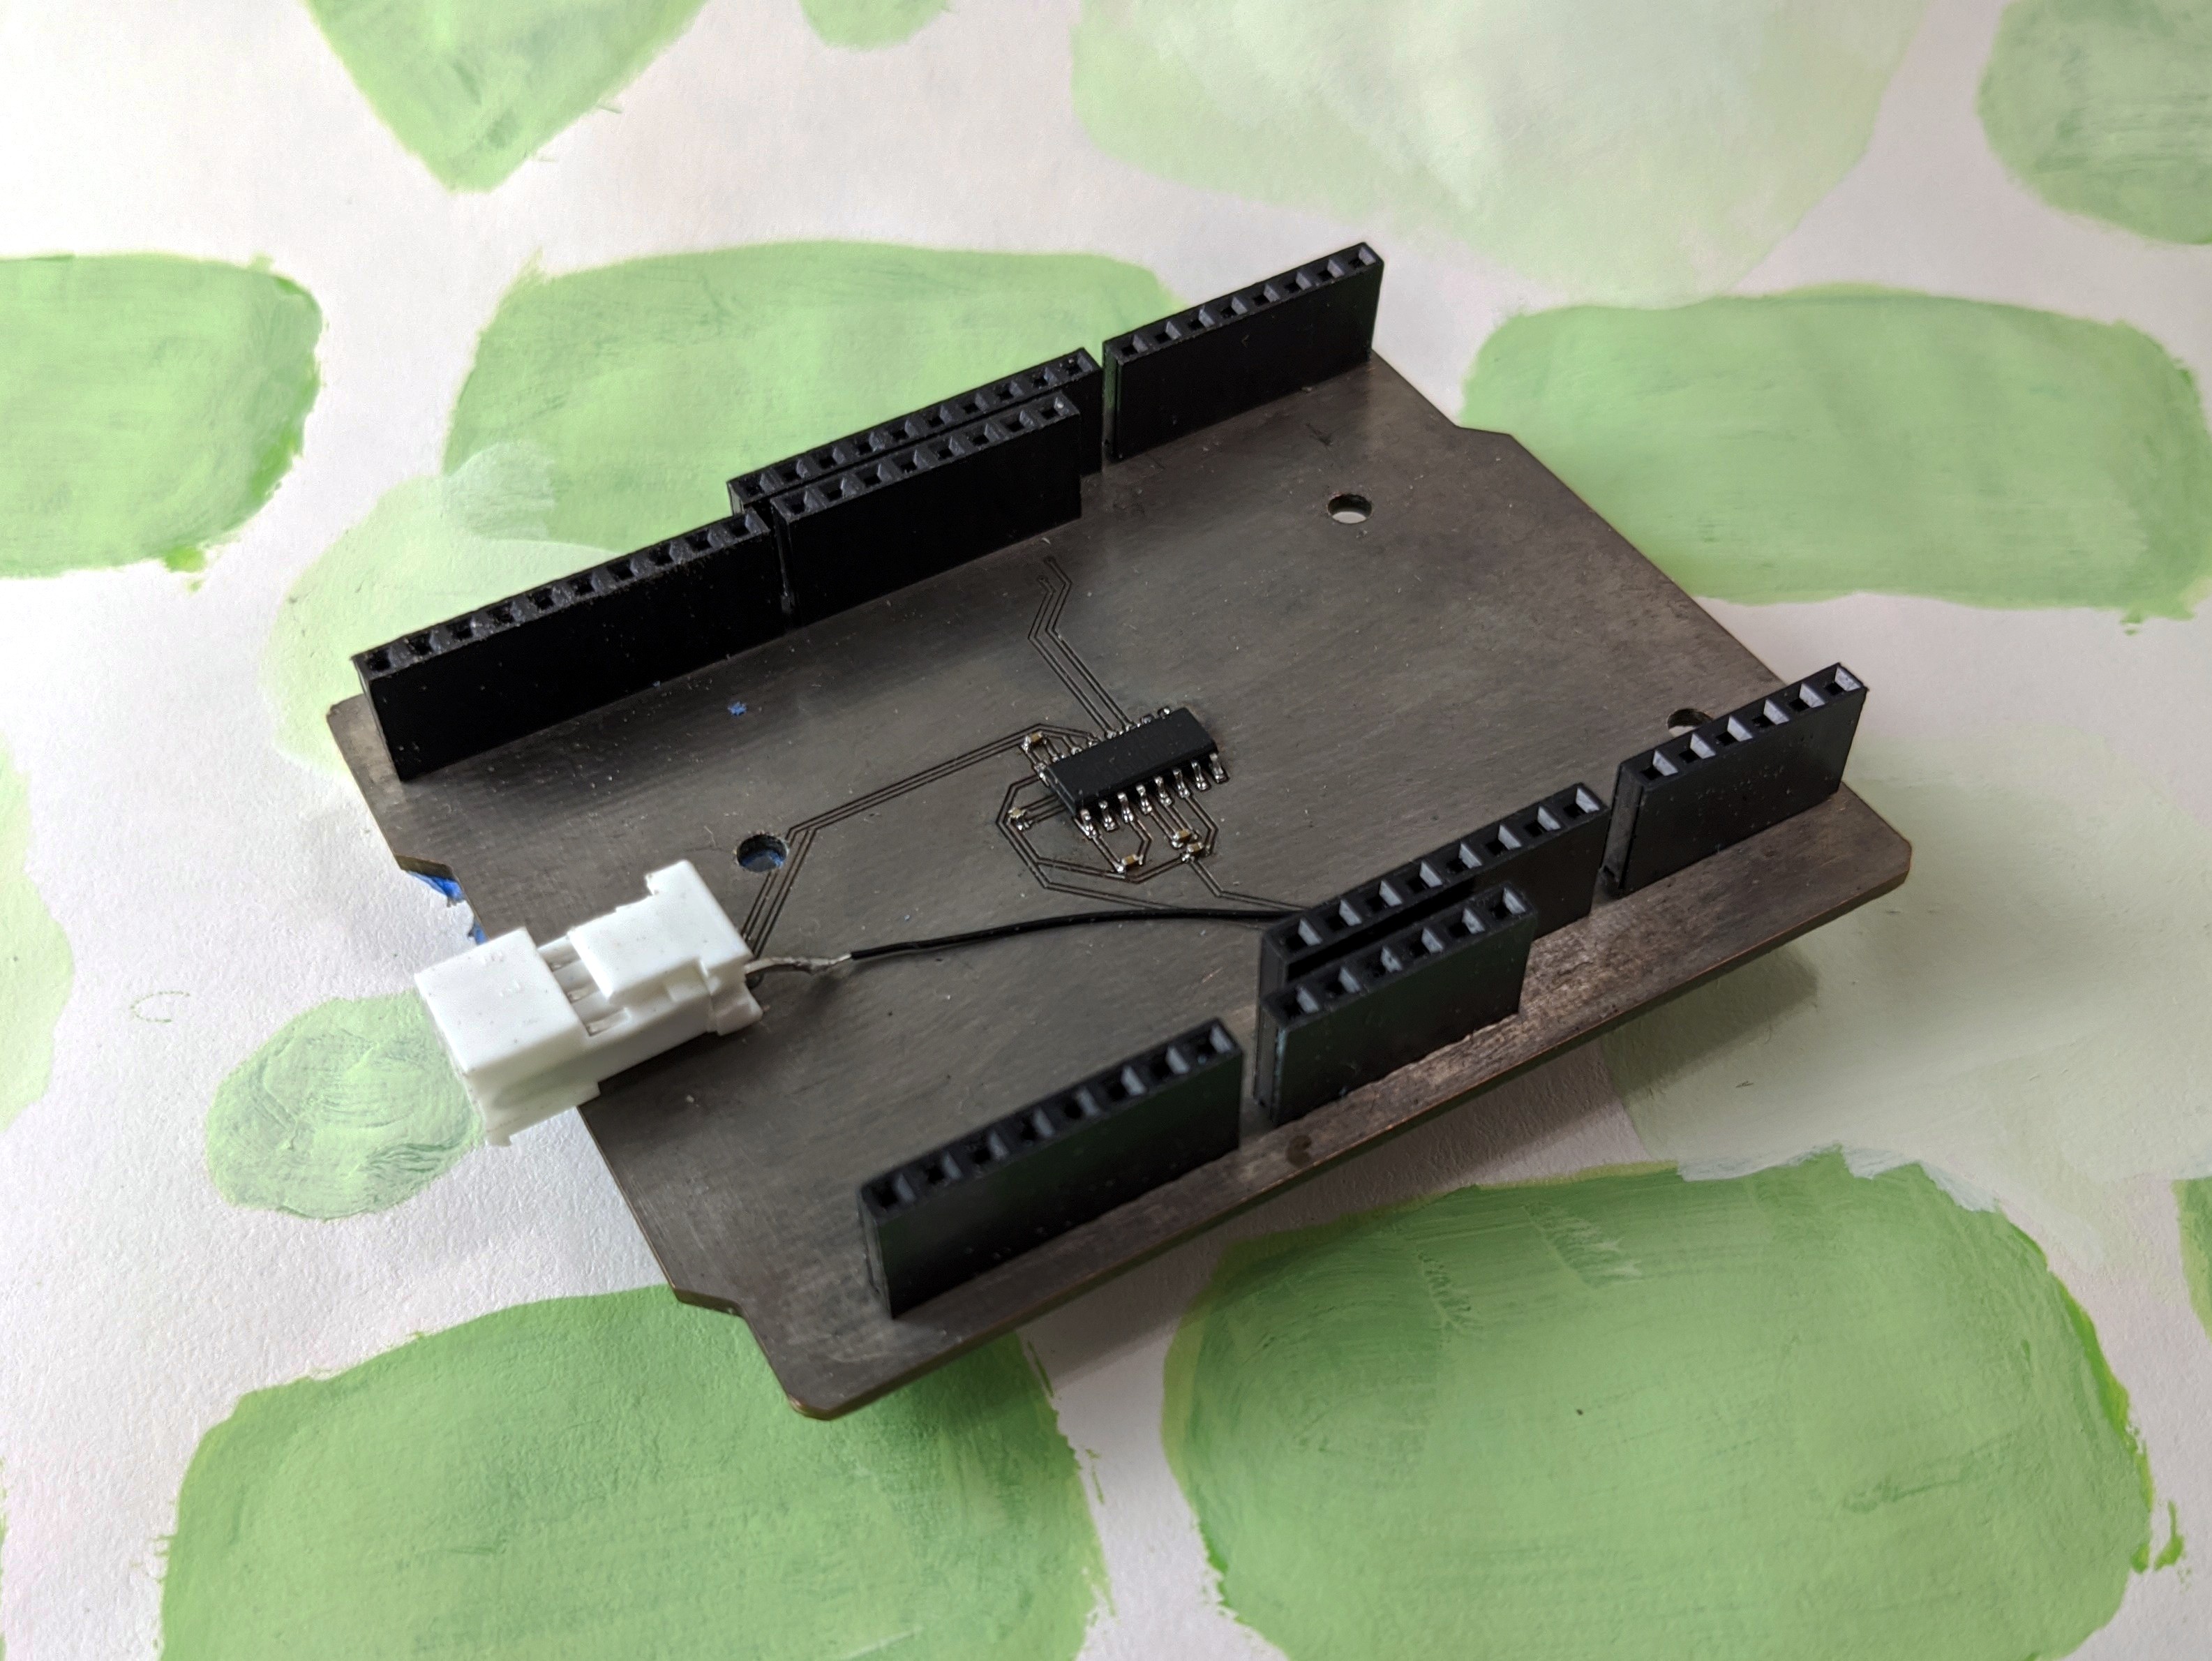
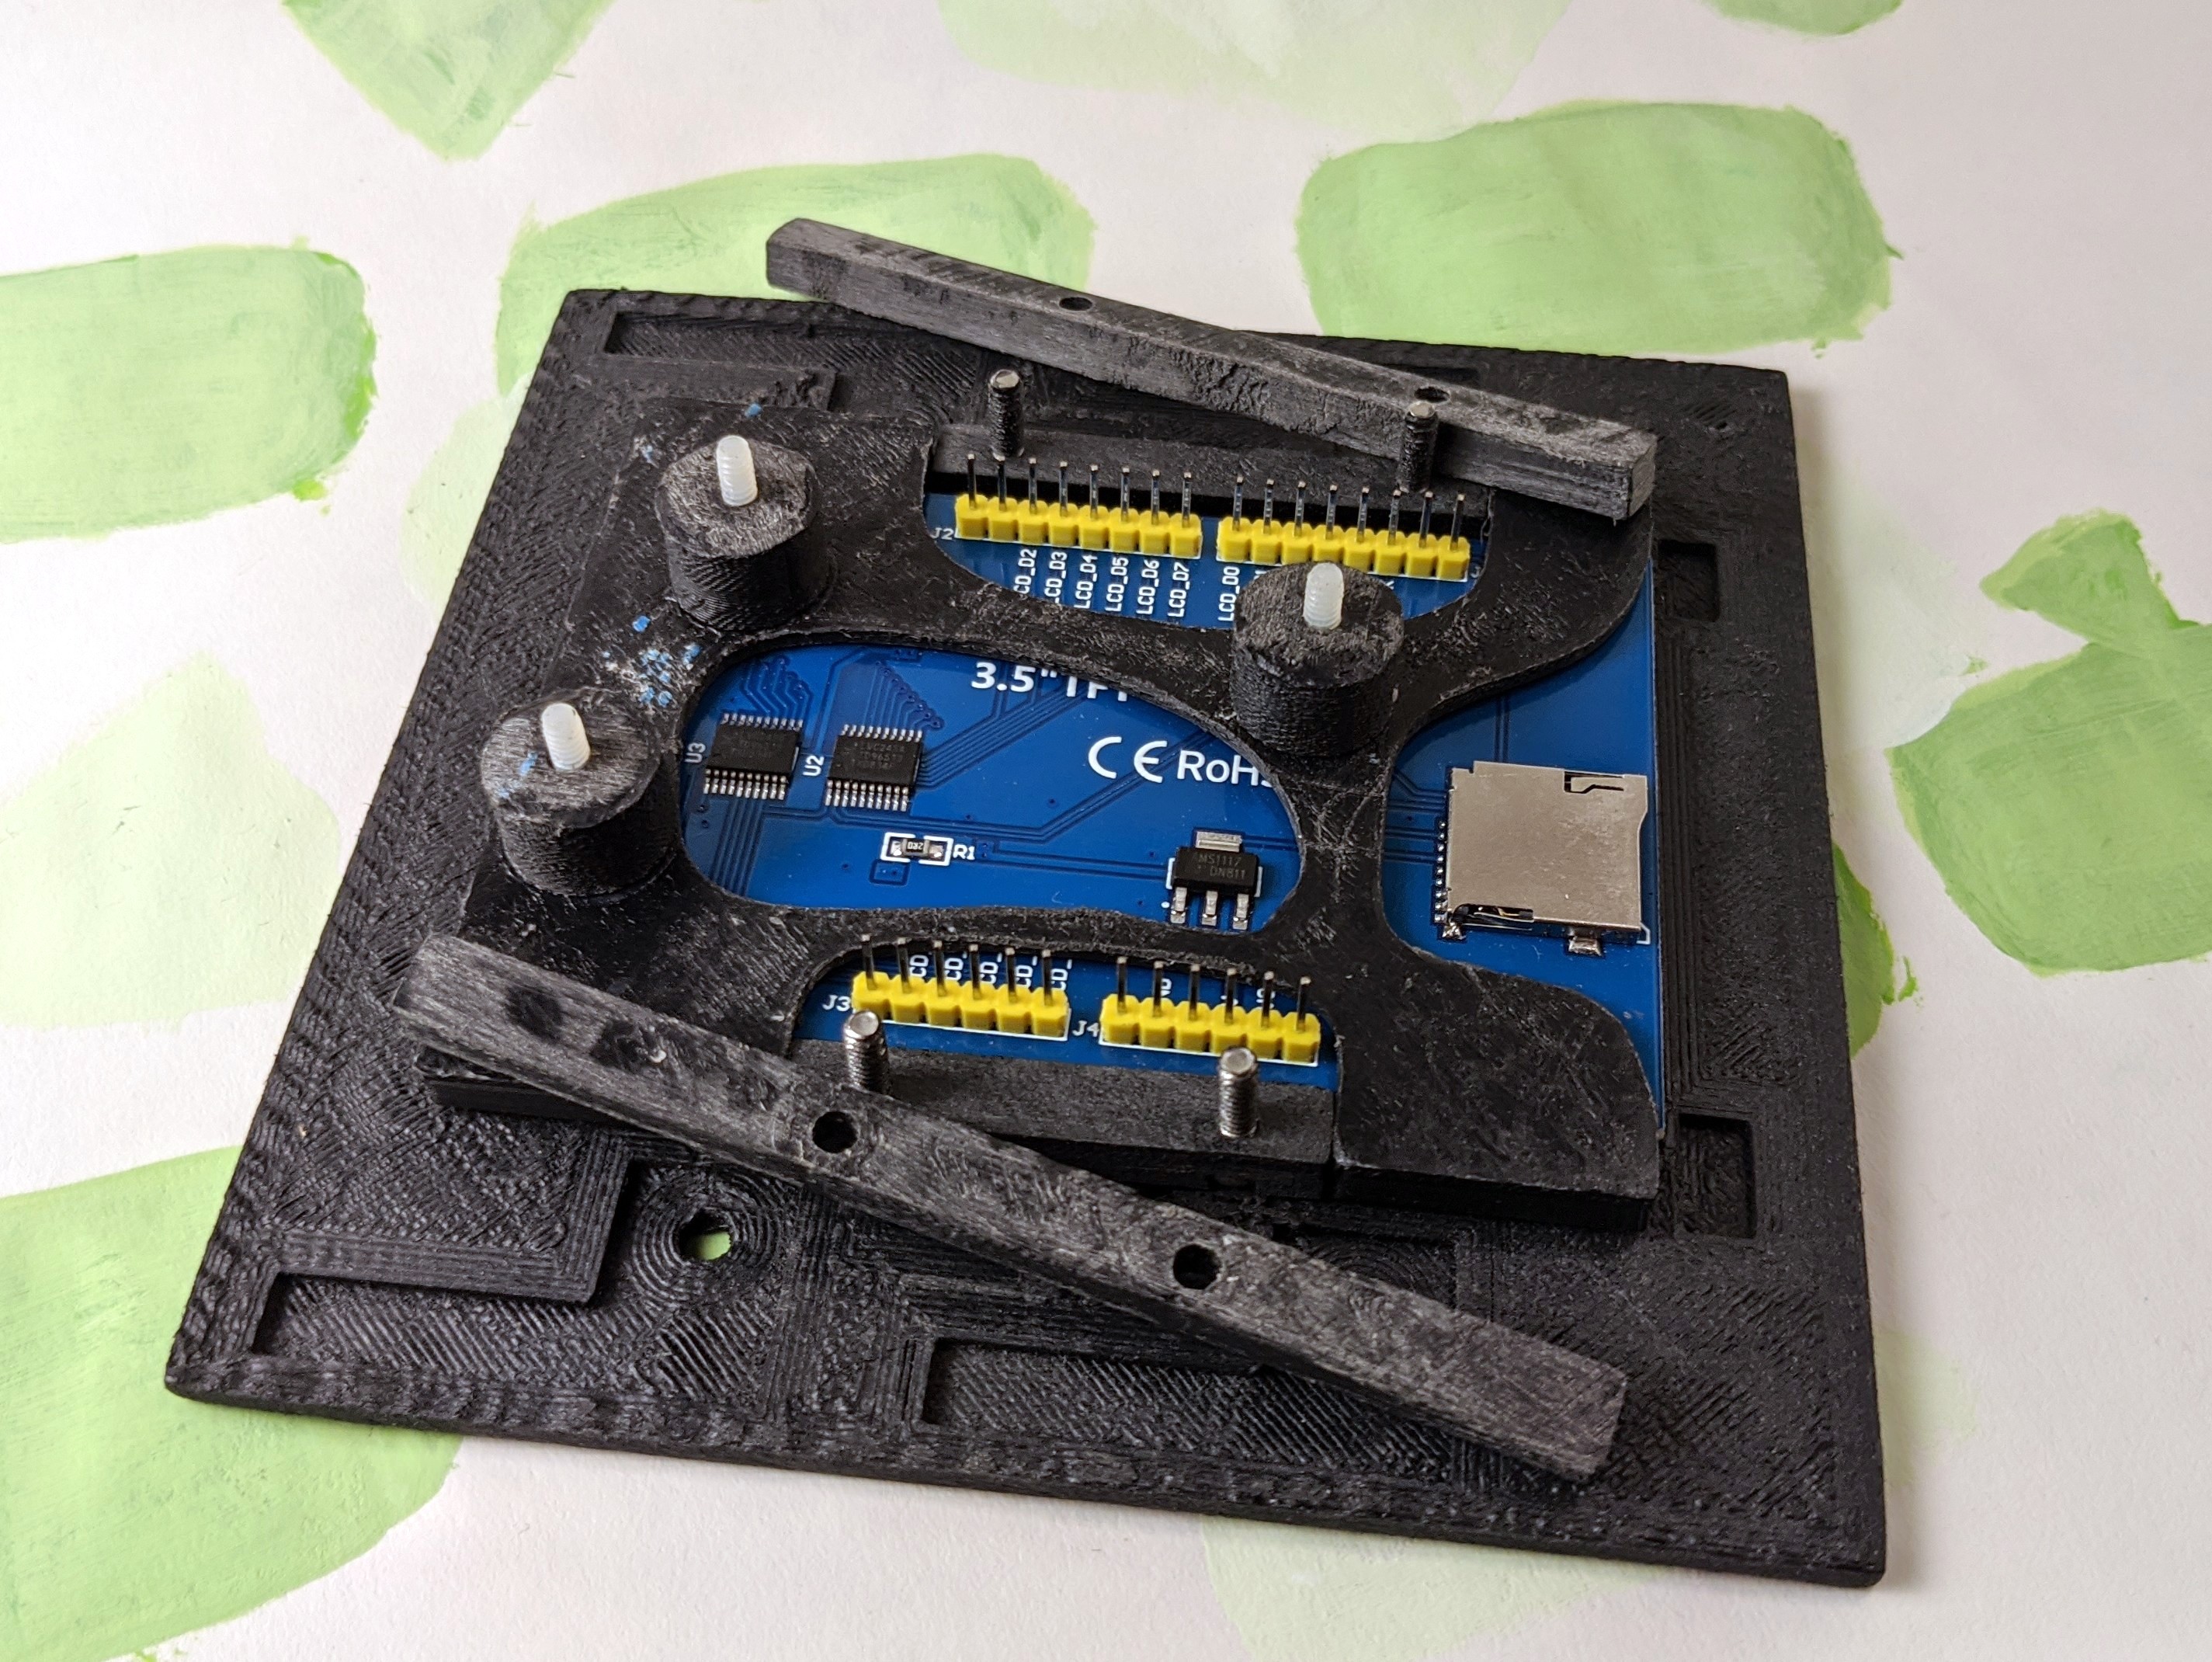
PCB shield for the Arduino. Two sets of headers are used to shift the touchscreen. The chip on top handles RS232 communication.
The touch screen, when attached to the Arduino’s header pins, makes the assembly too wide. It needed to be shifted over several inches. To accomplish this goal, as well as to add optional support for RS232 communication, I built a PCB to shift the header positions to avoid manually soldering many wires.
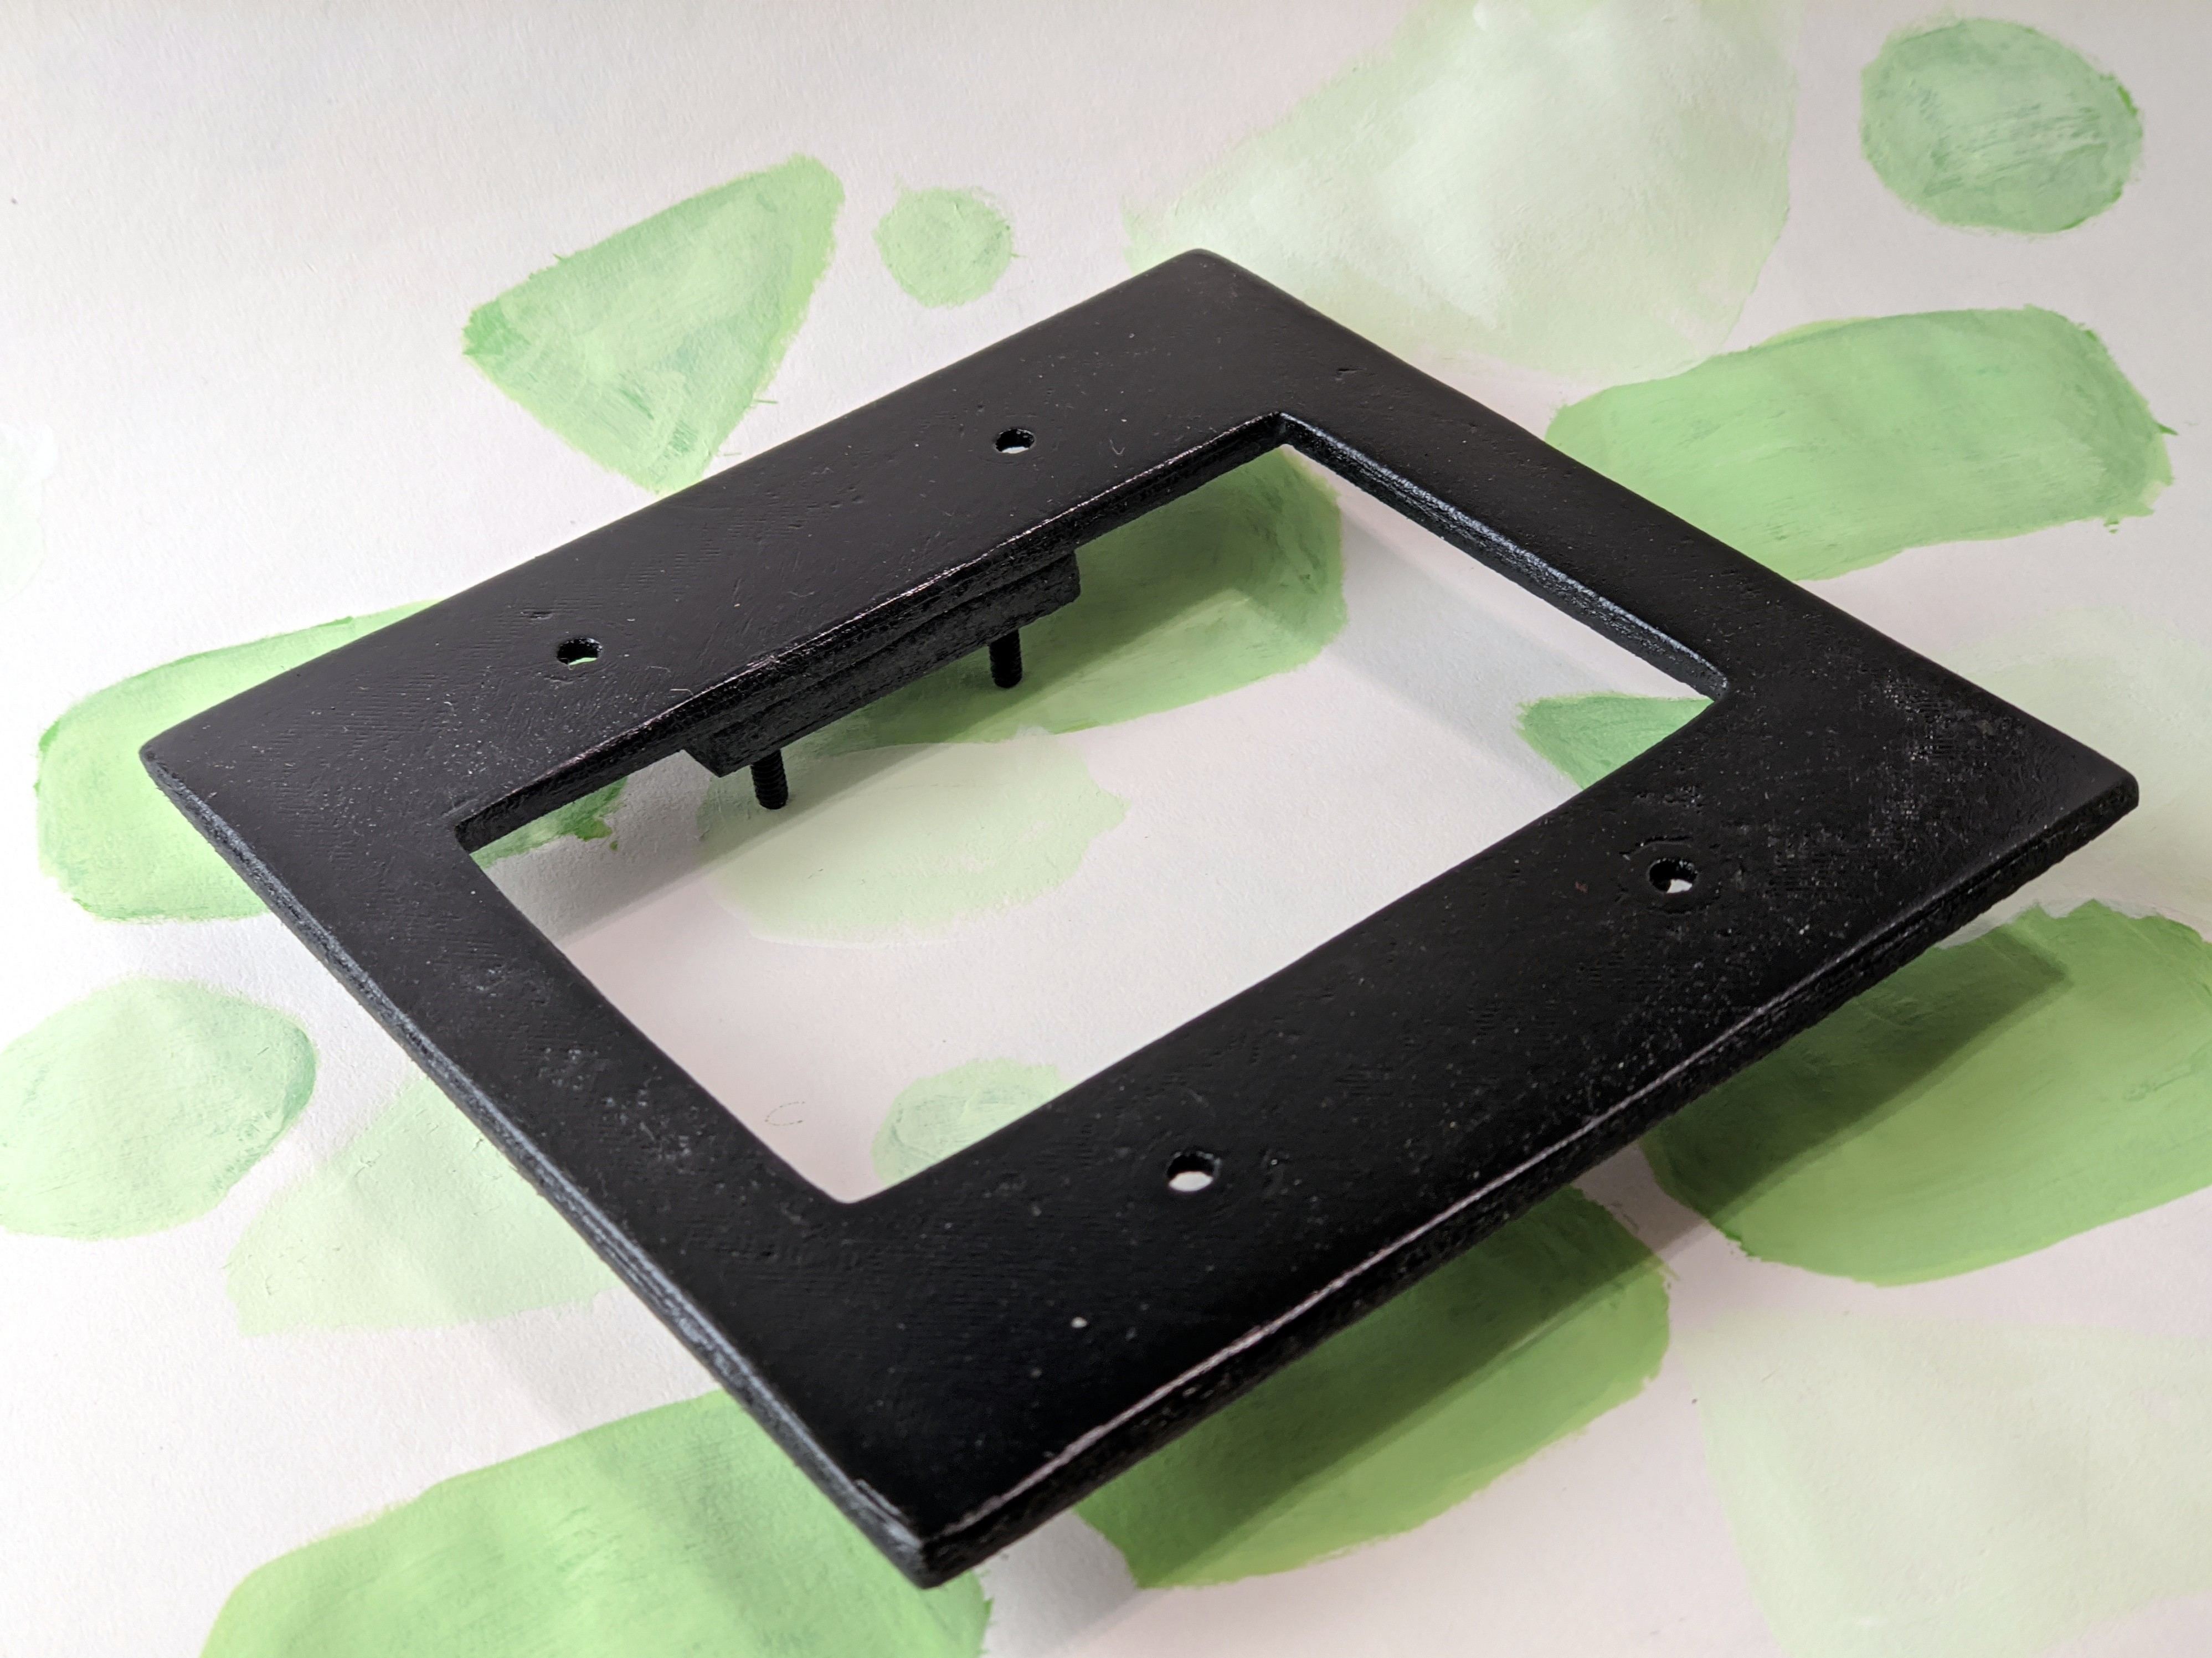
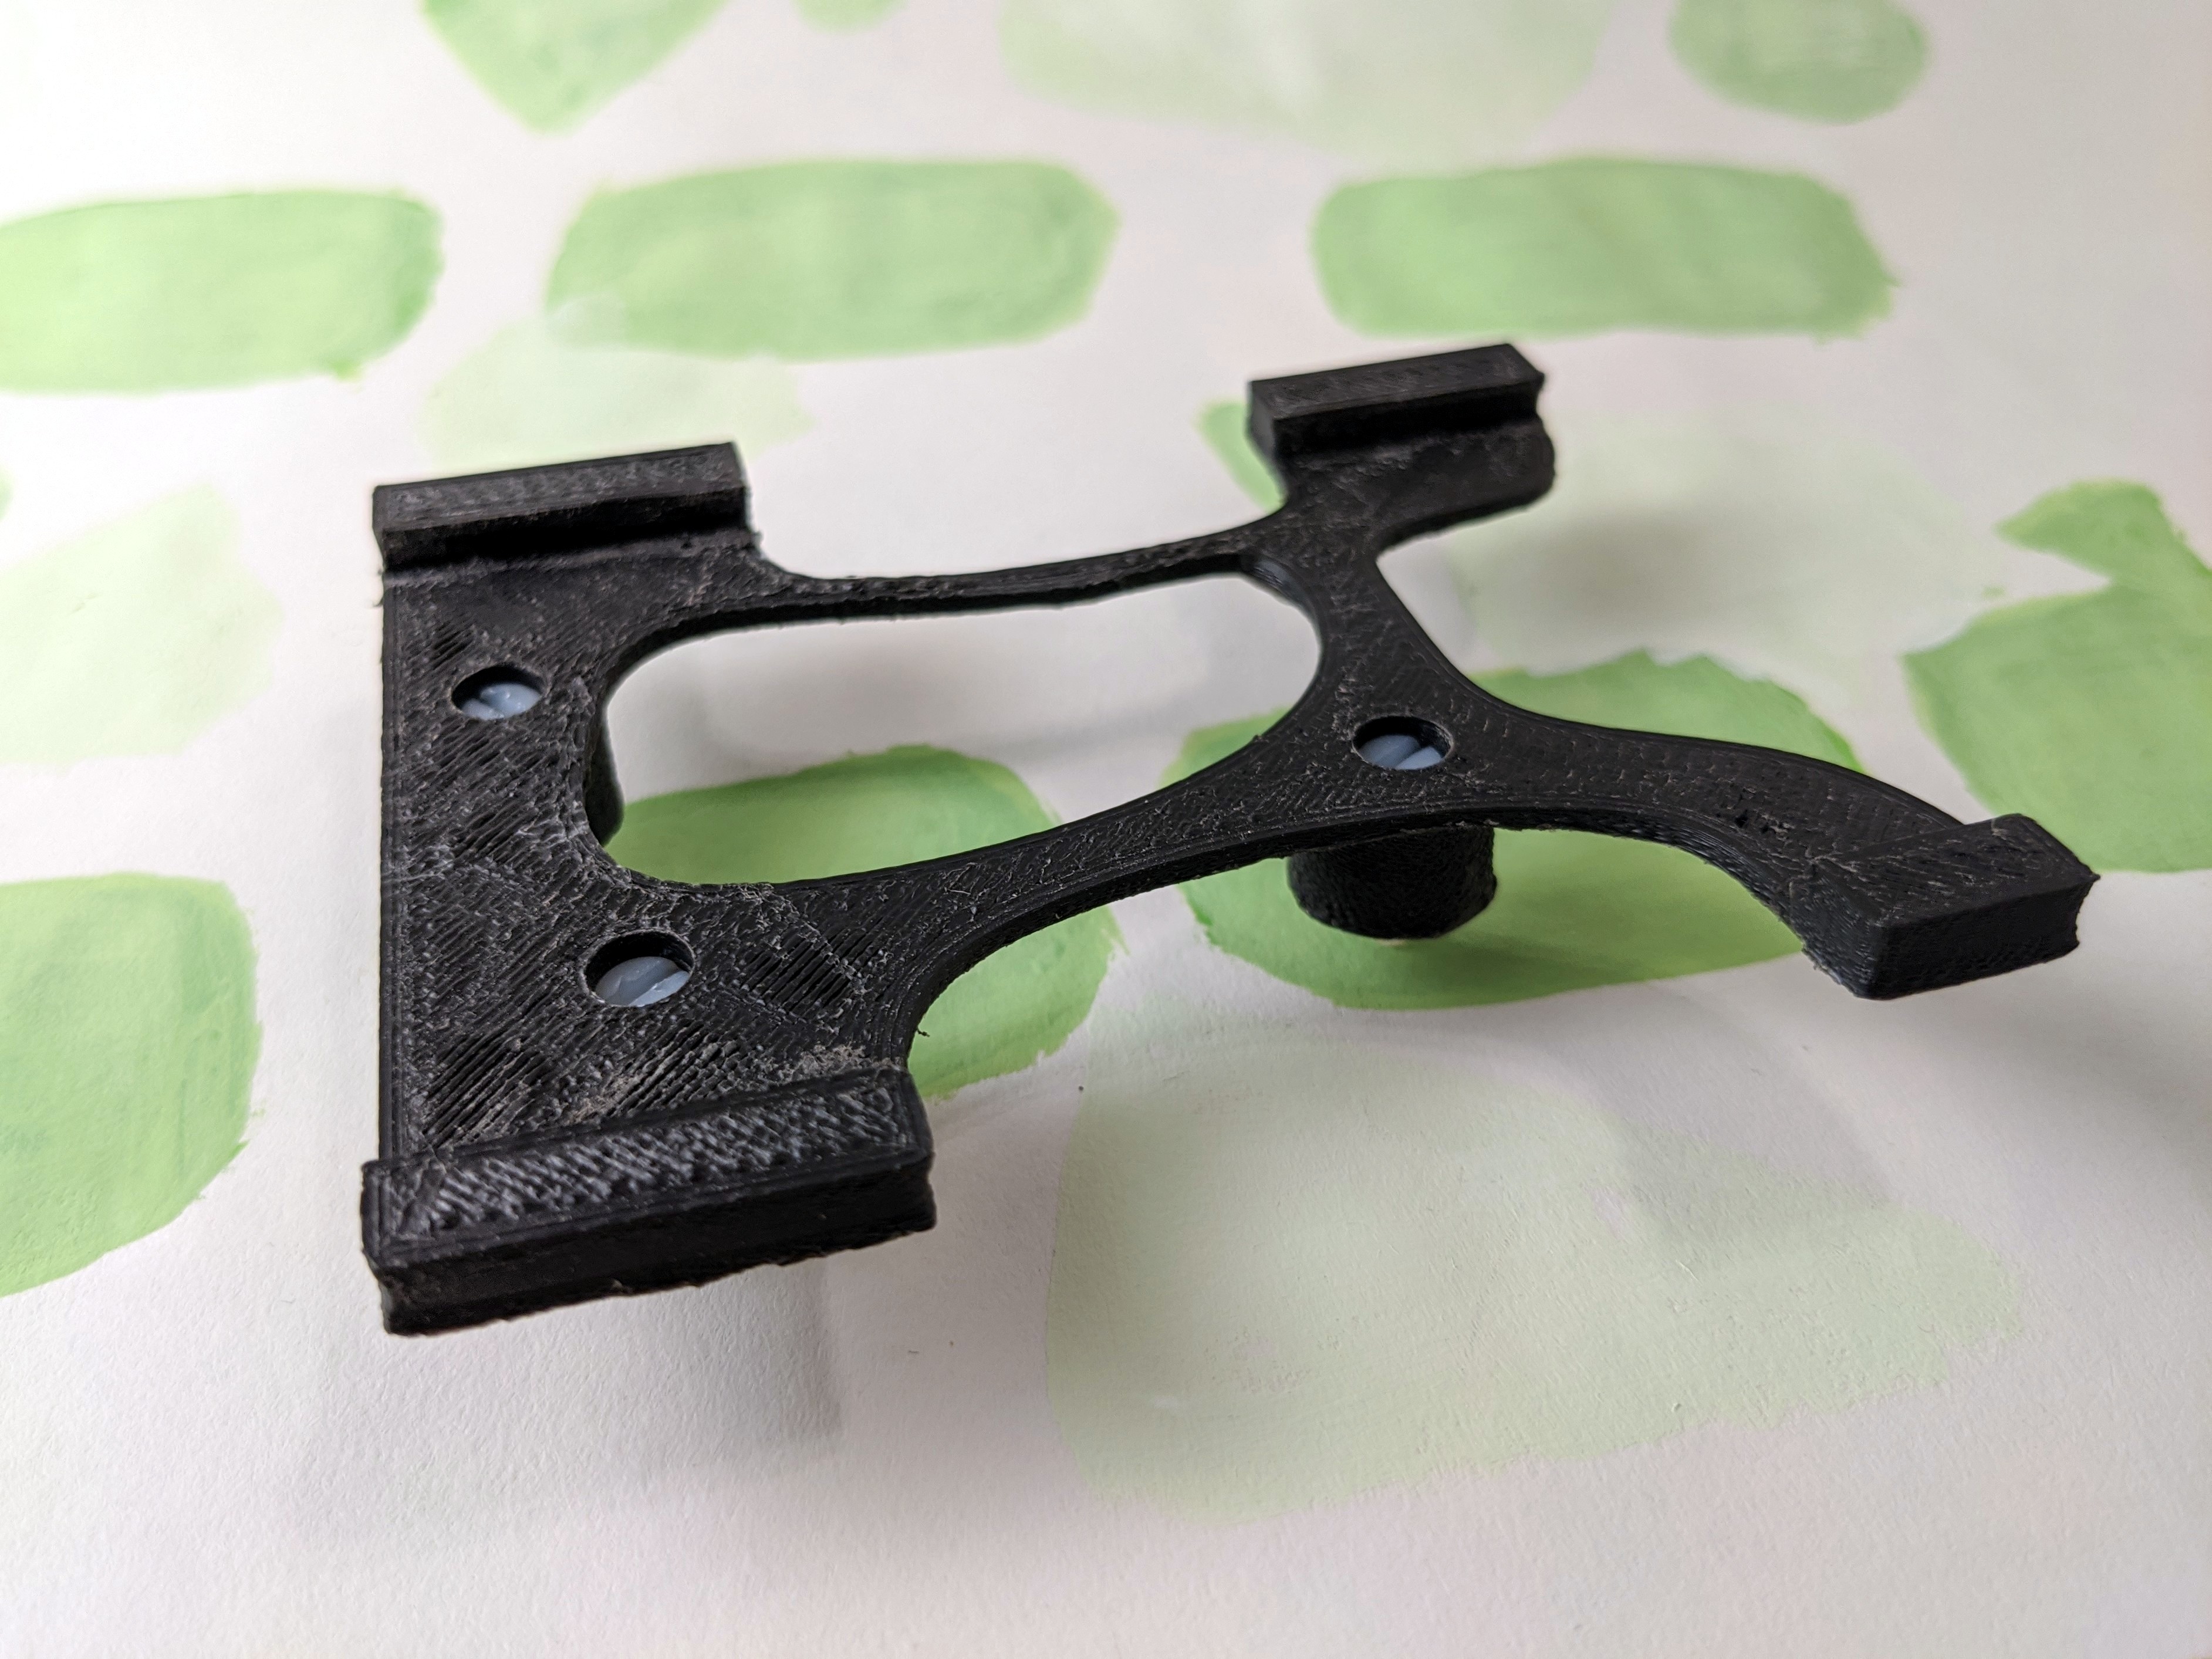
The whole system is joined by several 3D-printed parts. A plate locks to the weatherproof enclosure and constraints the Arduino board vertically. Another part fits over the plate to fully anchor the Arduino, and it is locked in by two long bars. Finally, the PCB is attached through the header pins, screwholes, and held by plastic nuts.
Software

The Arduino is programmed with the standard Arduino C++. However, the Arduino does not have ethernet or wifi capabilities. Rather than use shields to add functionality, which would increase size, I decided to separate responsibilities into two devices. The touchscreen is only responsible for managing its buttons, and talks about its state over serial. A Linux computer (I used a Beaglebone Black but just as easily could have used a Raspberry Pi or other mini-computer) handles the communication with Home Assistant and web configuration of the touchscreen using a Python program.
It’s Open Source!
All files for this project (Arduino code, CAD files, KiCad design files, Python server, and web configuration) can be found at the project’s GitHub repository if you’d like to build something similar yourself. Enjoy!